Cathie Schneider delivers an insightful and informative talk on the subject of specifying natural stone at this month’s CSC-GV luncheon on October 18th, 2017**Shout out to our venue hosts at the Grand Valley Construction Association who never complain about us leaving a trail of sandwich crumbs on the carpet. You’re the best!
Cathie Schneider, CTR, the VP of Stonequest Inc. is an accredited speaker with the Marble Institute of America and has been in the stone business for 25 years. She is a member of IDC Canada and the current Chair of the Grand Valley Chapter of Construction Specifications Canada. Architects, Interior Designers, Specifiers, Distributors, Landscape Architects, Contractors, Construction Managers, LEED Evangelists and ESPECIALLY Building Owners should listen carefully to the podcast recorded at this event, or better yet… reach out to Cathie before planning your next projectwith natural stone!
Who is Joe?
Joe Ippolito, CTR and VP of Quarry Sales at Arriscraft makes a brief “guest appearance” on the podcast. We will be sending him a courtesy copy. Same with Stefanie Hargest of Boehmer’s Block whoknows a thing or two about building toLEED Standards. She gives great hugs too (go to the 1:11 mark on the video).
Cathie Schneider takes us on a stone quest to Rivendell where all the Consultants of Elrond (Design & Construction Team) are thriving under the transformative leadership of the building Frodowner…
she will share the magic word with you if you ask nice (or you could try Stefanie)
**Like the Soundtrack? Special thanks to Mother West Wind’s Animal Friends (recorded at a live performance in 2016 at the End of Summer Festival in Uptown Waterloo)
The First Annual Guitars For Kids Fundraiser captured live at the Preston Legion on Sunday, November 29th, 2015 Good times brought to you by Cambridge Live Music in partnership with Bob’s Guitar Service, Queen Street Music School and the Idea Exchange
Outstanding community support that just keeps on growing for this very worthy cause and one of the most rewarding volunteer opportunities out there…
Want more?
More smiles, more music and a message from Bob Egan
Gorilla recorded and mixed live off the floor using a Zoom H-6
Hosted by Midday with RJ from FM 98.5 CKWR – Cambridge Live Music’s Official Media Sponsor
Special thanks to the Fiddle & Firkin for preparing an amazing buffet for all the performers, and Black Tie Affair Hospitality for their assistance with serving and clean-up.
The goal of the reamp box is to make the amplifier react in
exactly the same way a live guitar would,
but with a pre-recorded audio source
Q. 1 What is re-amping?
Re-amping is the process whereby the direct signal from a guitar, bass or keyboard is recorded — usually on a separate track alongside the signal captured simultaneously with a microphone from an amp — and later routed to an amp in a studio to be miked up and overdubbed.
Q.2 Why is it used?
This approach allows the choice of amp or amp settings, or mic and mic position, to be changed after the initial recorded performance, but without the compromises and limitations inherent in trying to process an already recorded amp sound. It is a popular and widely used technique, although it is more common in the production of some musical genres than others.
Q.3 Does Re-amping save time?
Re-amping can be both a time saver and a time waster, depending on how and why it is employed! As a way of modifying a guitar part to better suit the track as the mix progresses, it is an invaluable technique, saving the time and effort of having to record a new performance. However, if used to avoid committing to a sound during tracking, it can be an enormous time waster.
Q.4 What does a re-amping box do?
There are various products available with integrated facilities for re-amping, as well as dedicated re-amping units, although the latter approach seems the more popular. There is nothing complicated about a re-amp box, which, in most cases, is essentially a passive DI box used in reverse.
A re-amping box accepts a balanced line‑level signal (nominally +4dBu) and converts it to an unbalanced instrument‑level signal (nominally ‑18dBu), usually via a transformer. A variable level control is often provided to optimize the level fed to the amp, along with a ground‑lift facility to separate the balanced source and unbalanced output grounds, thus avoiding ground‑loop hum problems.
A passive DI box can often be used reasonably well in this role, although it is normally necessary to attenuate the line‑level input significantly, to avoid saturating the transformer and generating an excessive unbalanced output level. Alternatively, the kind of line-level balanced/unbalanced interface intended for connecting domestic equipment to professional systems can be used, and the original ART CleanBox is often recommended in this role. However, for only a slightly greater outlay, a dedicated re-amp box, such as the Radial ProRMP, is rather more convenient to use. .
Q.5 What musical changes are achieved by re-amping ?
Examples of common re-amping objectives include musically useful amplifier distortion, room tone, compression, EQ/filters, envelopes, resonance, and gating.
Q.6 What is meant by “warming up” dry tracks ?
Re-amping is often used to “warm up” dry tracks, which often means adding complex, musically interesting compression, distortion, filtering, ambience, and other pleasing effects. By playing a dry signal through a studio’s main monitors and then using room mics to capture the ambience, engineers are able to create realistic reverbs and blend the wet signal with the original dry recording to achieve the desired amount of depth.
Q.7 What are some advantages of re-amping ?
Re-amping allows guitarists and other electronic musicians to record their tracks and go home, leaving the engineer and producer to spend more time dialing in “just right” settings and effects on prerecorded tracks. When re-amping electric guitar tracks, the guitarist need not be present for the engineer to experiment long hours with a range of effects, mic positions, speaker cabinets, amplifiers, effects pedals, and overall tonality – continuously replaying the prerecorded tracks while experimenting with new settings and tones. When a desired tone is finally achieved, the guitarist’s dry performance is re-recorded, or “re-amped,” with all added effects.
Q.8 Who were some of the early ‘pioneers’ of re-amping ?
Les Paul and Mary Ford recorded layered vocal harmonies and guitar parts, modifying prior tracks with effects such as ambient reverb while recording the net result together on a new track. Les Paul placed a loudspeaker at one end of a tunnel and a microphone at the other end. The loudspeaker played back previously recorded material – the microphone recorded the resulting altered sound.
Thanks to Wikipedia for answering questions #5 to #9!
Q.9 Why is re-amping so popular?
Re-amping is a technique that gained a lot of popularity in the last 15 years. The technique’s obvious advantages are numerous:
Direct recording is an ideal way to reserve tonal flexibility for mixing (especially useful in the DIY world);
Instrument amplifiers and stomp boxes offer virtually limitless opportunities to create the right sound with a not-so-virtual interface;
It’s fun, which is still allowed.
Sometimes the re-amping goal is simple. An electric guitar can be recorded direct while monitoring a software amp simulator. During mixing the direct guitar track (sans faux amp) will be re-recorded through an actual amp.
Q.10 What does the work flow look like ?
Other popular uses include adding some grit to a direct bass track, rescuing underwhelming keyboard sounds, or using your favorite stomp boxes as outboard processing. In any case, if the goal of the process is amp-related, you can be sure it is also more or less distortion-related.
Q.11 How do you manage the gain staging of a re-amped signal?
As pictured above, the re-amp process requires us to adapt the balanced, relatively low impedance output from our DAW to the unbalanced, high impedance input of the amp or pedal(s) in question. The biggest factor in managing the gain staging of your re-amping signal chain is your choice of adapter.
The two choices are:
A purpose built adapter, like the ones made by the company called Reamp, or Radial Engineering; or
A passive direct box (so say some).
The purpose-built re-amping devices (most of which are derivative of John Cuniberti’s early 1990’s design) have the distinct advantage of being designed to operate in the amplitude and impedance ranges typically found in +4dBu pro audio and the instrument amplifier world. The same cannot be said of a typical passive direct box. These are important characteristics of inductive systems.
That’s not to say you can’t get the signal flow happening with a passive DI and an adequate amount of attenuation. However, the passive DI fails to simply supply a properly adapted signal. If your goal is to use the amps and pedals as signal processors, the adapter ought to facilitate that work, not pile on it’s own distortion.
Q.12 How do you address the relative phase of the original & the re-amped signal ?
Relative Phase
In applications where the originally recorded signal and the re-amped signal will be used in the mix together, their relative phase is an important tone-shaping factor.
There are two great options for addressing the relative phase of these two signals (options that put a polarity switch to shame):
Speaker to mic distance. For many signals, moving the microphone back and forth along the pick-up axis will reveal a dramatic range of tonal difference. This can be particularly apparent with signals that have complex midrange harmonic content.
Phase ‘alignment’ tools, like the IBP from Little Labs. Used as the re-amping adapter or after the mic pre-amplified return, these devices provide sweepable electronic control over relative phase. This allows the mic to stay in the spot you liked the most.
Regardless of your choice of tool, remember that relative phase is a subjective tone control in this setting. Don’t think about what’s right or wrong.
Q.13 What do you do if the two signals do not sound right together ?
Sometimes it can be difficult to decide whether the original signal should be used in combination with the re-amped signal. In these cases there’s usually something unique about each signal, but they may not be working together well.
This conflict can often be resolved by creating more contrast between the original and re-amped signals. On keyboard tracks, for example, I will frequently make significant, crossover-style EQ choices that allow me to more subtly combine the unique elements of each signal type.
Another technique that can be used with remarkable ease is one I dubiously call “Sum and Amp-ness”. I think it kills for gritty bass, particularly with tight, close drums.
Use a DI bass right up the middle of your mix. Get it sounding great, and setup a re-amp path;
Setup a nicely overdriven bass tone on an amp. Somewhere in signal flow, HPF this path in the 300 – 500Hz neighborhood. I like to do it before the amp;
Use the return from the amp just as you would use the ‘side’ component of a mid-side mic array. For maximum sum and difference affect, mic the amp off-axis.
This set-up leaves you with strong, centered low frequency focus, but adds an interesting distorted ‘width’ component. Try it out in mono-tending drum and bass situations.
Finally, don’t be afraid to let the re-amp path hang out in input monitoring while you mix. There’s no real reason to record it until you’re getting close to printing mixes. It’s incredibly easy to make changes as long as it’s all still live.
Thanks to Pro Audio Files for answering questions #9 to #13!
Q.14 How do you load down a guitar ?
THE LOADING ISSUE
To capture a characteristic guitar sound, you need to record the same thing you would hear if the guitar connected directly to an amp. Although many people like the “high-fidelity” sound of a guitar feeding an ultra-high impedance input, others prefer the slight dulling that occurs with a low-impedance load (e.g., around 5-100 kohms) as found with some effects boxes, older solid-state amps, etc. This is especially useful when the guitar precedes distortion, as distorting high frequencies can give a grating, brittle effect that resembles Sponge Bob on helium.
There are several ways to load down your guitar:
Find a box that loads down your guitar by the desired amount, then split the guitar to both the box and the mixer or audio interface’s “guitar” input.
If your recorder, mixer, or sound card has a guitar input, try using one of the regular line level inputs instead.
Use a box with variable input impedance (e.g., the “drag control” on Radial products)
Create a special patch cord with the desired amount of loading by soldering a resistor between the hot and ground of either one of the plugs. A typical value would be 10 kohms.
If you’re going through host software with plug-ins, insert an EQ and roll off the desired amount of highs before feeding whatever produces distortion (e.g., an outboard amp that feeds back into the host, or an amp simulator plug-in). However, this doesn’t sound quite as authentic as actually loading down the pickup, which creates more complex tonal changes.
Note that you need to add this load while recording, as it’s the interaction between the pickup’s inductance and load that produces the desired effect. Once the dry track is recorded, the pickup is out of the picture.
But just because we have a signal doesn’t mean we can go home and collect our royalties, because this signal now goes through a signal path that may include pedals and other devices. As guitarists are very sensitive to the tone of their rigs, even the slightest variation from what’s expected may be a problem. For example, the transformers in some direct boxes or preamps color the sound slightly, so the guitarist might want to send the signal through the transformer, even though transformer isolation is usually not necessary with a signal coming from a recorder.
Q.15 What are some plug-ins and interfaces available ?
Traditional re-amping is replaced by virtual re-amping using guitar-amp plug‑ins, many of which offer remarkably good quality and enormous versatility. The process is exactly the same, but without having to physically route the signal out of the DAW and into a real amp in a real studio, miked up with real mics.
Plug-ins and low-latency audio interfaces have opened up “virtual re-amping” options. Guitar-oriented plug-ins include IK Multimedia AmpliTube, Native Instruments Guitar Rig, Line 6 POD Farm, Scuffham Amps, Waves G|T|R|, iZotope Trash, Peavey ReValver, Overloud TH2, McDSP Chrome Tone, and others.
The concept is similar to hardware-based re-amping: Record the direct signal to a track, and monitor through an amp. The key to “virtual re-amping” is that the host records a straight (dry) guitar signal to the track. So, any processing that occurs depends entirely on the plug-in(s) you’ve selected; you can process the guitar as desired while mixing, including changing “virtual amps.” When mixing, you can use different plug-ins for different amp sounds, and/or do traditional hardware re-amping by sending the recorded track through an output, then into a mic’ed hardware amp.
Q.16 What are the limitations when using a plug-in ?
Using plug-ins has limitations. If feedback is part of your sound, there’s no easy way to create a feedback loop with a direct-recorded track. This is one reason for monitoring through a real amp, as any effect the amp has on your strings will be recorded in the direct track. Still, this isn’t as interactive as feeding back with the amp that creates your final sound. And plug-ins themselves have limitations; although digital technology does a remarkable job of modeling amp sounds, picky purists may pout that some subtleties that don’t translate well.
Furthermore, monitoring through a host program demands low-latency drivers (e.g., Steinberg ASIO, Apple Core Audio, or Microsoft’s low-latency drivers like WDM/KS). Otherwise, you’ll hear a delay as you play. Although there will always be some delay due to the A/D and D/A conversion process, with modern systems total latency can often be under 10ms. For some perspective, 3 ms of latency is about the same delay that would occur if you moved your head 1 meter (3 feet) further from a speaker—not really enough to affect the “feel” of your playing.
If latency is an issue, there are other ways to monitor, like ASIO Direct Monitoring. Input signal monitoring (often called zero-latency monitoring) is essentially instantaneous; the signal appearing at the audio interface input is simply directed to the audio interface out, without passing through any plug-ins. With this method you can also feed the output to a guitar amp for monitoring, while recording the straight signal on tape.
In any event, regardless of whether you use hardware re-amping, virtual re-amping, or a combination, the fact that the process lets you go back and change a track’s fundamental sound without having to re-record it is significant. If you haven’t tried re-amping yet, give it a shot—it will add a useful new tool to your bag of tricks.
Q.17 When did the term “re-amping” come into use ?
Background: A History of Re-Amping
by Peter Janis, Radial Engineering
As with so many aspects of audio, it’s hard to pin down exactly when a technique was first used, and that goes for re-amping. While Reamp made the first commercial box designed expressly for this purpose, engineers had already been creating re-amping setups for years. Recording historian Doug Mitchell, Associate Professor at Middle Tennessee State University, comments that “The process of ‘re-amping’ has actually been utilized since the early days of recording in a variety of methods. However, the actual process may not have been referred to as re-amping until perhaps the late ’60s or ’70s. From the early possibilities of recording sound, various composers and experimenters utilized what might be termed ‘re-amping’ to take advantage of the recording process and to expand upon its possibilities.
The first commercially available box for re-amping has been tweaked and revised over the years.
“In 1913 Italian Futurist Luigi Russolo proposed something he termed the ‘Art of Noises.’ Recordings of any sound (anything was legitimate) were made on Berliner discs and played back via ‘noise machines’ in live scenarios and re-recorded on ‘master’ disc cutters. This concept was furthered by Pierre Schaeffer and his ‘Musique Concrète’ electronic music concept in the ’30s and ’40s. Schaeffer would utilize sounds such as trains in highly manipulated processes to compose new music ideas. These processes often involved the replaying and acoustic re-recording of material in a manipulated fashion. Other experimenters in this area included Karlheinz Stockhausen and Edgard Varèse.
“With the possibilities presented by magnetic recording, the process of what might be termed re-amping was utilized in other ‘pop’ music areas. Perhaps the first person to take advantage of this was Les Paul. His recordings with Mary Ford often utilized multiple harmonies all performed by Mary. Initially these harmonies were performed via the re-amping process. Later, Les convinced Ampex to make the first 8-track recorder so that he might utilize track comping to perform a similar function. Les is also credited with the utilization of the re-amping process for the creation of reverberant soundfields, by placing a loudspeaker at one end of a long tunnel area under his home and a microphone at the other end. Reverberation time could be altered with the placement of the microphone with respect to the loudspeaker playing back previously recorded material.
“Wall of sound pioneer Phil Spector is perhaps the most widely accredited for the use of the re-amping process, and because of his association with the Beatles, is potentially regarded today as the developer of the process. However, Phil was actually refining a process and exploring its possibility for use in rock music.
One of the most powerful tools for expanding your sonic pallet in the studio is a reamping box–a box that converts the output from your mixer/interface/tape machine to an instrument-level signal. Suddenly, all of your guitar amps, effects pedals, and synthesizers become effects for any signal you can throw at them.
A reamping box is a great first-project for DIY beginners: it’s totally passive (you can’t shock yourself), there are a limited number of solder joints to make, and there’s plenty of room to make those joints. For a better idea of what’s involved in this build, check out this video on how to make a simple reamping box: here
Full kits are currently available, including everything needed to complete the project:
High-quality transformer by Edcor USA
Pre-drilled, diecast aluminum case
TRS jacks by Neutrik
Xicon metal-film resistor
Toggle switch
All hookup wire needed
Nut, bolt, and lock washer for ground connection
Q.19 What does guitar re-amping sound like?
In a nutshell, it sounds real. Follow this link for examples from Pure Mix Advanced Audio. Thanks to Ben Lindell for this awesome tutorial
Quite a difference right? I love how the reamped track is crunchy but with some life to it. So what was my signal path? This track started with my Telecaster running into the Demeter Tube DI box connected to a DBX 386 pre and into my Digidesign 192. Then for reamping the signal traveled out of a Digidesign 192 into the Little Labs Redeye then into a Mesa Boogie Nomad 55 on the clean channel with the ‘Pushed’ switch flipped. I recorded it with a Beyerdynamic M 201 TG about a foot away going through one of my custom germanium preamps and combined that with a Neumann U87 in omni a bit further away running though an API 3124 preamp and into an 1176 to maximize the room tone.
Q.20 What are some of the applications promoted by “REAMP” ?
1. Change amplifier make, tone settings, and effects at any time after original performance. A flat direct safety track is recommended but not always necessary for the best results. Preserve the inspired first-takes, always knowing you can REAMP later if you are unhappy with the amplified sound.
2. Engineers and producers can experiment with mic placement and room ambiance without asking the musician to keep playing over and over. Record a scratch direct signal on tape/disk and feed it to the musician’s amp via the REAMP and experiment.
3. Insert instrument effects at any time during production. REAMP from tape/disk to any stomp box (such as a wah-wah, or overdrive), then take the effects output and return it to the console via a direct box.
4. Live recordings direct from the instrument’s output to tape/disk can later be REAMP’ed in the studio. This solves many problems related to remote recording. You can match the sound for a punch in by using the original instrument and direct box, thereby making only small repairs. After the repairs are done, REAMP to any amplifier instead of re-recording the entire performance. The REAMP is the cheapest insurance policy going!
5. Insert studio pre-amps, equalizers, signal processors, and dynamics control before reaching the instrument amplifier.
6. Synthesized guitar and bass tracks can sound more live-like by RE-AMPing into an instrument amplifier and using mics. Send drum tracks to various instrument amps and mic the room for ambiance.
7. No need to record instrument amps during a tracking session if space or leakage is a problem; perfect for late night home recording. The next day plug in your amp, turn it up and REAMP the previous night’s performance. Record the bass direct and REAMP later to tape/disk or during the mix.
8. REAMP the same performance with different amps and stack the sounds for various textures and panning. You can use the REAMP to overdrive the front end of a guitar amp for intense distortion by turning up the REAMP’s trim control to eleven!!
Having graduated with a bachelors and masters in audio and music, Mike is a well versed audio engineer, musician, and educator. From working with Grammy award winning engineers down to small start up studios, he has seen all sides of the industry, and what it takes to get the job done right. Make sure to stop by his blog Lean Audio, which covers the bare necessities and how to do audio on the cheap. From plugin reviews to heads upon free stuff, his goal is to save you time and money. Be sure to follow him on Facebook to stay up to date.
#1 Where do you place a single mic to best fill in the bass region?
The microphone is placed just above the kick drum aimed at the toms and pulled back a few feet. This technique will obviously emphasis the bass drum but if your microphone is lacking a little in the bass region then this will help to fill it in
#2 Should you use a small diaphragm or a large diaphragm condenser mic?
If you need a very articulate sound then a small diaphragm condenser will be your best bet as they have a very fast transient response. However if you find a small diaphragm condenser to be too bright then using a large diaphragm condenser will prove more to your liking with the added benefit of a larger proximity effect if using a cardioid pattern which can help to emphasize the bass drum
#3 How about if i want to add more snare? more toms?
move the microphone up a little more so that it is starting to look down over the kit and move in slightly but not so much that it is actually over the drum set. This technique will give you a little more tom, cymbal and snare sound since it is looking down at the kit as oppose to straight at it
#4 What placement will allow for more attack sound?
microphone placement is going to be even higher up than the previous and actually be slightly over the set; barely over the toms to be specific. In addition you will also want to aim the microphone down a little more. This placement will give you more emphasis on the cymbals and toms and provide a more balanced sound if your microphone is balanced sounding as well.
You can of course also continue to move the microphone straight above the drum set until it’s facing down but you may end up losing some of the bottom end and full tone of the toms and get more attack.
However again the choice is yours but I do recommend choosing a mic placement that ensures a good tom and cymbal sound as we are trying to avoid having to mic every drum and micing every tom would defeat that purpose.
#5 Any good drum solos recorded in mono out there?
Yes! Open-air mono recording of Mark Craney doing a drum solo at the Roxy in Hollywood in 1977:
“The Highly Unlikely Result of a Life-Long Fan with a Really Crazy Idea”
by Brian Lewis, Producer, LosTraxx Records
This is the story of how a recording by a couple of teenagers in 1969 found its way into a 2012 release for one of Australasia’s most famous bands. Back in 1969, Max Merritt and The Meteors, like many other top tier bands, used to play regularly at a Saturday night dance in the S.E Melbourne suburbs called Spectra. It ran biweekly and alternated between Waverley and Ashwood high schools, and would draw about 1,000 teenagers. My older brother David, and some mates and I, volunteered as stage crew to help the roadies setup and breakdown, as there were often 3 or 4 bands that played each night. During sets we got to listen from anywhere in the hall, including backstage, and we didn’t have to pay to get in either. Life for teenage boys in Melbourne didn’t get much better than that in those days. One dance night late in 1969, after we cleared it with Martin Cook, the promoter, we rigged a set of four mics – three overhead and one for the PA – and fed them into the hall’s mixing board, and then fed the mix into a mate’s reel-to-reel tape recorder. The hope was to get permission to record the bands so we would end up with a recording or two for our own enjoyment. So after my brother got face-to-face permission from Max, we rolled the tape and captured the set. Shortly after we made the recording, we had a one-off LP cut from the tape, and I have had that LP since it was made. I digitized it a few years back so I could listen to it on iTunes without tearing up the LP. As far as I knew, it was the only remaining copy of the recording we had made. I credit my ex-wife Bonnie with the idea of releasing the Merritt recording. Her suggestion prompted me to contact my old friend Lloyd in England, who had some hands-on experience in the music business. He advised us we had great content that would make a good release, if we could find the master tape and get it digitally remastered. To me, that was a very big “IF”. As it happened, my brother kept the master tape stored away all those years, and recently having found it, we had it digitally remastered, and that was really what kicked off the project. The quality was so good it was a no-brainer. Between recording the set and having the tape digitally remastered, it became apparent to me that we had captured something special. As a fan, it had always bothered me that other fans didn’t have the opportunity to listen to this live set, so now I had to make sure that happened. I became a man with a mission. As a complete outsider to the music industry, I had to put in a lot of research before I could present a plausible plan to Max and his manager. Lucky for me I am a quick study, plus my enthusiasm, and an amazing amount of support from music industry, made up for my lack of prior music industry knowledge and experience. After I contacted Max and sent him a remastered sample for his approval, everything fell into place. If it wasn’t for my angel investor Jo, the internet tools for Indie labels – mechanical licensing by Limelight, global distribution of digital and physical music through companies like Tunecore and Amazon, economical high-tech promotional tools like Play MPE – and getting help from complete music industry strangers, whose only interest was in getting the music out to the fans, the project would never have got off the ground. The most gratifying aspect of the project for me, from the graciousness of Max on down, there was not a single person I contacted in the course of the project that did not go out of their way to support what I was trying to do. They patiently heard me out, and helped turn my ideas into a project, and ultimately a release. I was humbled by the experience, and I am also very thankful to every one of them. I could not have done it without them. Personally, I am also extremely proud that I was able to finally get this music into the hands of Max Merritt and The Meteors fans around the world. A little late in coming maybe, but better late than never as they say! “My ultimate hope is that fans will make this album a big retro hit, as a way to thank Max, and continue to pay him back for the 50+ years of good times he has given us all.” For more information about this release contact: Brian Lewis (U.S Central Time Zone 24/7)
816-885-5527 or email brian@lostraxx.com
#7 What’s THE most important thing to remember when recording drums with one microphone?
PLACEMENT
Graham Cochrane says place your (cardoid) condenser mike right in the middle of the kit…in front of the snare, across from Hi-Hats, in front of low toms & in front of kick drum:
#10 What did Engineer Jim Scott say about the mainly mono recording of “Californication”
To get a tight, upfront sound you have to put the mics really close to the drums
The microphone setup was a basic rock & roll approach that I learnt in The Record Plant in the ’80s, nothing too fancy.
“I used a Neumann U47 on the kick drum, putting it right inside. There were two Sennheiser MD421s on the toms, two Neumann U87s as overheads, and an Shure SM57 on the hi-hat. The snare was picked up by two SM57 mics, one above it and one underneath it, plus a Neumann KM84 on top, which gave me a good-mic/bad-mic setup: between the two you can find the ideal sound, and you can get brightness and fullness. The three snare mics all ended up on one track. The SM57 underneath the snare gave me more of the rattle of the snare drum. Especially in soul ballads the snare rattle is a really beautiful sound, but Chad plays a little too fast to use much of it. We had a second set of drums in the room, which was tuned completely differently, kind of mismatched and oversized. We used that on the track ‘Porcelain’. It had more rattle on the snare drum, and a fluffier-sounding kick drum, plus a sizzle cymbal. Because of the nature of the room there was more room for these sounds. I used microphone left-overs for that kit. I think there was an SM57 on the snare drum, an Electrovoice RE20 on the kick drum, and two RCA77 ribbon microphones as a general drum balance. I also had a pair of Neumann M50s in the room for ambience on both drum kits, but although they went to tape, I didn’t use them in the mix.”
JIM SCOTT: Recording Red Hot Chili Peppers’ Californications
most of it is in good old mono, and there’s hardly any reverb.
The result is a very compact, punchy sound.
Mono helps to keep things loud…
We decided that we didn’t want things
suddenly blasting from the left channel on this record.
TWO DIRECTIONAL MICS ARE MOUNTED WITH GRILLES NEARLY TOUCHING AND DIAPHRAGMS, ON ABOVE THE OTHER , SYMMETRICALLY ANGLED FROM THE CENTRE LINE
FROM “HOME RECORDING FOR MUSICIANS FOR DUMMIES”:
When you record using the X-Y technique, keep these points in mind:
The stereo image (the placement of the instruments in the sonic environment) isn’t as wide or realistic as it is in real life. The X-Y technique is easy to set up and results in a decent sound, so (as with all things in life) you have to deal with the compromise this ease creates.
No solution to this exists, so if a wide stereo image is important to you, consider using a different stereo technique, such as the spaced pair or perhaps a Jecklin disk.
Don’t use two mics when one is enough. After you get a pair of nice mics for X-Y miking, you’ll want to use them on everything. A stereo-mic approach to a classical guitar composition is nice, but honestly, recording the acoustic guitar in a rock ballad with five other instruments playing isn’t necessary and just makes life more complicated when you mix the song.
Keep some distance between the mics and the sound source. The X-Y technique has no benefit over a single mic if you place your mics within a couple of feet of the sound source.
You simply don’t have enough space for a stereo image to develop until you’re at least 6 feet from the instrument or group of instruments. In fact, you should be at least 10 feet from the sound source before using the X-Y stereo miking approach.
A COINCIDENTAL PAIR METHOD USING TWO BI-DIRECTIONAL MICS ANGLED AT 90 DEGREES APART AND FACING THE LEFT AND RIGHT SIDES OF THE BAND/ENSEMBLE
9. WHAT IS MS RECORDING?
A FORM OF THE COINCIDENTAL PAIR TECHNIQUE WHERE A MIC (USUALLY A CARDIOID MID) IS FACING DIRECTLY AT THE SOURCE TO PICK UP ON-AXIS SOUND WHICH IS SUMMED AND DIFFERENCED WITH A BIO-DIRECTIONAL MIC FACING LEFT AND RIGHT PICKING UP OFF-AXIS SOUND
TWO SIGNALS ARE COMBINED VIA THE M-S MATRIX TO PROVIDE A VARIABLE CONTROLLED STEREO IMAGE
ADJUSTING THE LEVEL OF MID VERSUS SIDE SIGNALS, A NARROWER OR WIDER IMAGE CAN BE CREATED
10. WHERE WOULD YOU USE THE MS TECHNIQUE?
WHEN LOCALIZATION ACCURACY IS IMPORTANT
LIVE CONCERTS WHERE YOU CANNOT PHYSICALLY ADJUST THE MICS DURING THE PERFORMANCE. STEREO SPREAD CAN BE REMOTE CONTROLLED
TWO IDENTICAL MICS (CARDIOID OR OMNI-DIRECTIONAL) ARE PLACED 3-10FEET APART, AIMING DIRECTLY AHEAD TOWARD THE BAND/ENSEMBLE
THE GREATER THE DISTANCE BETWEEN THE MICS, THE GREATER THE STEREO SPREAD
POTENTIAL FOR UNDESIRABLE PHASE CANCELLATION OF THE SIGNALS ESPECIALLY WHEN CONVERTING TO MONO- A MONO REFERENCE SOURCE SHOULD BE USED TO CHECK FOR PHASE PROBLEMS
12. WHAT HAPPENS IF ONE INSTRUMENT IS CLOSER TO ONE MIC THAN THE OTHER?
SOUND REACHES ONE MIC BEFORE THE OTHER
BOTH MICS PRODUCE ALMOST THE SAME SIGNAL BUT ONE MIC SIGNAL IS DELAYED WITH RESPECT TO THE OTHER
13. HOW DOES THE BRAIN DECODE THIS ?
IT DECODES TIME DIFFERENCES INTO CORRESPONDING IMAGE LOCATIONS
IT TAKES ABOUT 1.5 MILLISECONDS OF DELAY TO SHIFT AN IMAGE ALL THE WAY TO ONE SPEAKER
14. HOW DO YOU CONTROL THE IMAGE USING INSTRUMENT PLACEMENT?
TO REPRODUCE THE INSTRUMENT AT THE RIGHT SPEAKER, SOUND MUST ARRIVE AT THE RIGHT MIC ABOUT 1.5 MILLISECONDS BEFORE IT REACHES THE LEFT MIC
PLACE MICS 2FT APART
15. WHAT HAPPENS WHEN YOUR SPACING BETWEEN MICS IS FAR APART – 10 OR EVEN 12 FT FOR EXAMPLE?
INSTRUMENTS SLIGHTLY OFF-CENTRE PRODUCE INTERCHANNEL DELAYS GREATER THAN 1.5 MSEC, WHICH PLACES THEIR IMAGES AT THE LEFT OR RIGHT SPEAKER
16. WHAT IS THE TERM(S) COMMONLY USED TO DESCRIBE THIS EFFECT?
EXAGGERATED SEPARATION
PING-PONG EFFECT
17. WHY WOULD YOU USE THIS SPACED PAIR A-B MIC SET-UP?
TO MAKE OFF-CENTRE IMAGES UNFOCUSED OR HARD TO LOCALIZE
TO ENSURE CENTRED INSTRUMENTS ARE STILL HEARD CLEARLY IN THE CENTRE EVEN WHEN OFF-CENTRE INSTRUMENTS ARE DIFFICULT TO PINPOINT BETWEEN SPEAKERS
SONIC IMAGES ARE TO BE DIFFUSED OR BLENDED RATHER THAN SHARP
TO PROVIDE A WARM SENSE OF AMBIENCE WHERE IT FEELS LIKE THE ROOM REVERB IS SURROUNDING THE INSTRUMENT
18. WHAT ARE THE MAIN DISTINGUISHING FEATURES OF THE COINCIDENT PAIR TECHNIQUE?
LEVEL DIFFERENCES BETWEEN CHANNELS PRODUCE THE STEREO EFFECT
IMAGES ARE SHARP
SIGNALS ARE MONO-COMPATIBLE
19. WHAT ARE THE MAIN DISTINGUISHING FEATURES OF THE NEAR-COINCIDENTAL-PAIR TECHNIQUE?
LEVEL AND TIME DIFFERENCES BETWEEN CHANNELS PRODUCE THE STEREO EFFECT
STEREO SPREAD TENDS TO BE ACCURATE
IMAGES ARE SHARP
IMPROVEMENT OVER COINCIDENT METHODS FOR PROVIDING A GREATER SENSE OF “AIR” AND DEPTH
20. WHAT ARE THE MAIN DISTINGUISHING FEATURES OF THE BAFFLED-OMNI TECHNIQUE?
USES TWO OMNI-DIRECTIONAL MICS A FEW INCHES APART, SEPARATED BY A BAFFLE
LEVEL, TIME AND SPECTRAL DIFFERENCES BETWEEN CHANNELS PRODUCE THE STEREO EFFECT
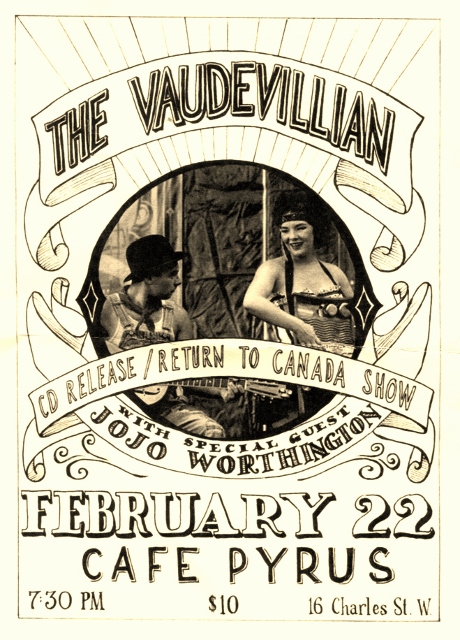
It dawned on me last night that Jessica had bought a CD at the Commons Cafe Wednesday afternoon and there was a little slip of paper inside the carefully folded CD cover with contact information….so i wrote a message to Brendan Stephens that went like this:
Hi folks,we caught your act at the commons cafe last Wednesday afternoon and thought it was great fun.A bunch of us are planning to come out to cafe pyrus saturday evening at 7:30 for more...with an afternoon primer of craft beer tasting at the Block 3
Brewery in St Jacob's (which we understand you already know about).
i pitched your sound to my audio recording class (conestoga college) so there may be some students coming hoping to capture a bit of your act as a sample recording. We are currently studying microphone
(mono & stereo) recording techniques. Our instructor, Dave Gray has
a collection of rare microphones that would give you guys a real
authentic vintage sound in your recordings. Not sure if he is going to
make it, but if you are interested, i can try to set up a recording
session with Dave Gray & the audio recording class on a Monday
evening. The class is located very close to cafe pyrus at the Kitchener Studio Projectwhich has taken over one half of the old post office building at 44 Gaukel Street.
You will see me with a Zoom H6 recorder in hand and i will introduce myself and double check that its ok to press "record". Just remember i am not a professional,but i do my best and would be happy to post a live recording on soundcloud and send you the link to download. My friend, Jessica is coming who is a professional
photographer from France (and world traveller) now living in Kitchener.
She will have her camera in hand, of course. She bought one of your
CD's last Wednesday at the commons cafe and may have lyrics memorized by
saturday lol - we will see.looking forward to Saturday evening's performance at cafe pyrus
here's a link to my class pitch fyi: carbon-microphone-recording-challenge-february-22nd/
 -- cheers
and the return:
That’s great news! Would love to set up a recording session and please do bring your recorder would love to have some live recording on soundcloud. Looking forward to seeing you guys! Thanks for getting in contact with me. We will chat more on Saturday!
“Brendan J Stephens and Willow Walker (The Vaudevillian) are 1920’s blues singers in the flesh. Hitchhiking between raucous house shows, rowdy bars and busking everywhere in between, they have crafted a way of singing both their own material and songs near one hundred years old in a way entirely their own”.
30. What has a brighter sounding attack, wooden sticks or nylon sticks?
nylon
29. What techniques are used for muffling and dampening drum tone?
dampening with duct tape, with facial tissue, cloth strip under the head, dampening with a wallet, head ring
28. What do you use to dampen the Kick Drum?
a duck down pillow with a brick or mike stand to keep it in place. The pillow should not touch the head ( = greater the dampening)
27. What mounting hardware is preferred for toms?
any mounting system that lets the drum float with no screwed-in hardware prepares the drum to sing
26. Why should you avoid mounting anything on the kick drum?
the more freedom any drum has from contact with another solid object, the better it will sound
25. What is the most essential of the microphones to use for the drum?
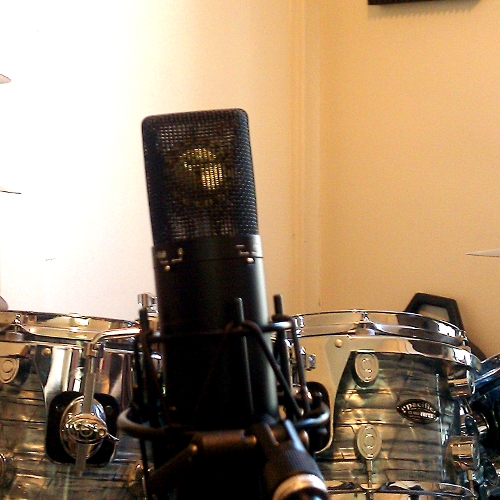
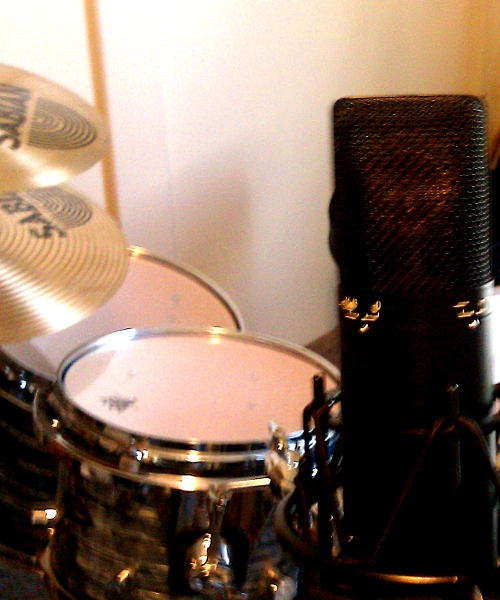
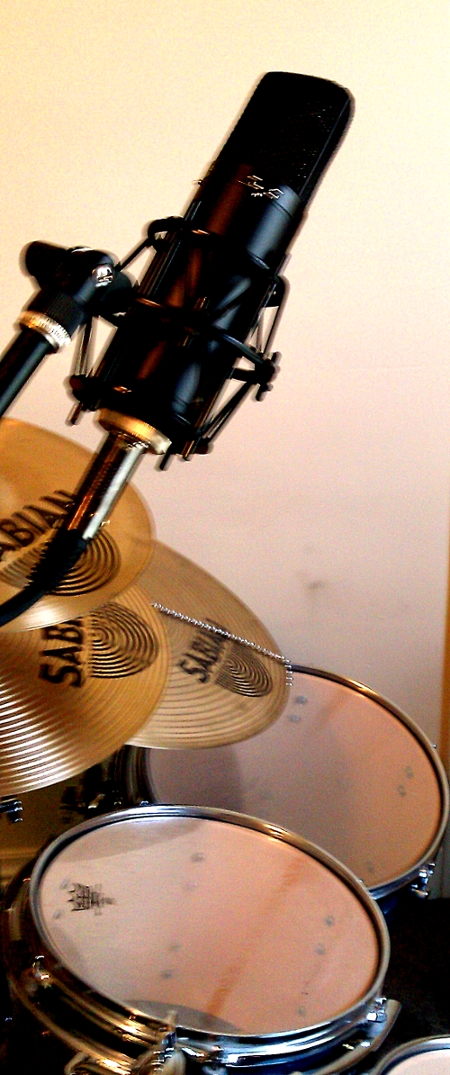
Condensers are the mic of choice for percussion as they respond to transients more accurately (tambourine, shaker, cymbals). Good to have a condenser mic for over the drums set and for cymbals
24. What microphone is preferred for close-miking toms, snare and kick?
moving coil mike (Shure SM57, Sennheiser 421, Electro-Voice RE20)
23. Why?
they can withstand intense amounts of volume before distorting
22. How do you find the drum tone?
to hear tone (head ringing) place mike near rim. When the stick hits near the rim the sound has more tone
21. Where is the attack?
to hear attack place mic near the centre of the head. When the stick hits near the centre the sound has more attack
20. When would you record at analog levels over 0VU?
a drum (usually kick and toms) recorded hot (+2 to +5VU) won’t usually produce a buzzing distortion
19. What is the point of oversaturation?
when the analog tape reaches the point where it can’t handle any more magnetism it will usually give the drum a compressed sound
18. What is the first thing you do to get a good sound from a snare drum?
make sure the heads are in good shape. If the top snare head has been stretched and dented to the point that the centre is sagging when the rest of the head is tight – replace the head
17. Why use a Hi-hat mic?
a separate track for the hat adds definition and provides pan control in the mix
16. Why not mike the the Hi-hats at the edge of the cymbals?
Miking at the edge of the cymbals produces a thick “gong” sound. Also, the air coming from the cymbals closing can cause a loud popping sound as it hits the mic diaghragm
15. Where is the best place to locate the mic on the Hi-hats?
at the bell of the top cymbal (clean sound with highs). Microphone should be a min of 3 inches from cymbal to minimize change in phase interaction between the cymbal and the mic capsule
14. Where do you aim the mic?
mic is pointed at the bell of the top cymbal, and if you point the back at a cymbal close by, you can (using the cardoid pick-up pattern) minimize the amount of crash that is recorded by the Hi-hat mic
13. What does a drummer need to monitor the rest of the band?
a good, well balanced headphones mix. Be sure the bass player and the drummer can hear the attach of the kick, snare and hi-hat. Don’t make them guess where the beat is
12. What are baffles?
small, freestanding partitions with either two soft sides or one soft side and one hard reflective side. Usually four feet square and 4 to 8 inches thick
11. Whats the biggest problem with using click tracks?
leakage of the click from the headphones into the drum microphones
10. What are the effects of compression on drum tracks?
it evens out the volume of each hit (level control) and it keeps the level even so that a weak hit doesn’t detract from the groove
9. How do you pan the drums to create a live band sound?
kick and snare are almost always panned centre since they are the foundation of the mix. Low frequency of the kick needs to be dispersed evenly between the left-right spectrum and the constant repetition of the snare is asking to be in the centre. A snare, panned to one side or other pulls the listener to that side and does not feel balanced
overheads are often panned hard left and right, though toms sound unnatural this way
8. What are the most difficult frequencies to dial in?
the lows. When the same low frequency is boosted on several instruments, energy accumulates and the mix level becomes artificially hot (meter says hot but the mix sounds cold)
7. What does a low-frequency boost achieve on a typical kick drum EQ?
a low frequency boost between 75 amd 150Hz adds a low, powerful thump to the kick drum sound
6. What does a mid-frequency cut achieve on a typical kick drum EQ?
a mid-frequency cut between 250 and 500Hz helps clean up the thick, cloudy sound of a close-miked kick
5. What does a high frequency boost achieve on a typical kick drum EQ?
a high-frequency boost between 3 and 5 kHz adds definition, attach and impact to the kick drum sound
4. How do you distinguish the “jazz” sound?
the kick is not dampened
3. What is an overhead?
when the mic is placed over the drums and pointed down at the set
2. What are the two primary options if you are using two microphones?
1. use both mics together in a stereo configuration
2. use one mic for overall pickup and the other for a specific instrument
1. How do you get a punchy drum sound?
Close miking technique: each drum will typically have its own mic…plus two overheads on separate tracks